Thursday 27 October 2011

Viewport Canvas painting

I was quite daunted by the prospect of texturing the MIR space station. The texture page is quite complex and is quite slow to look for the bits you want to paint and guess the result, specially when making panels.

I have been looking at a tool that allows me to paint straight into the 3d model. Viewport Canvas lets me do just that. I am just blocking out the panels and although the result is quite crude, I can use this as a guide to make the final texture much quicker.

Tuesday 25 October 2011

Starting MIR texturing

I have all the models built, UV mapped and ingame and I am currently in the process of texturing them.

I thought it was a good idea to make sure the game works before doing all the fun part which is building the models. That is why I  developed all the gameplay with placeholder models and even once I had the final models built they were still untextured.

I think that not seeing the final model until the end keeps the interest and also allows you to play the final version of the game almost with fresh eyes.

Anyway, having all the models built and UV mapped allows me to move quickly from texturing one model to the next. I finished the astronaut yesterday and I have started the MIR russian station today.

This is by far the more challenging model of all the available in the game. Due to the restrictions in texture size and the ammount of geometry and repeated elements, this is the model that reuses more texture elements.

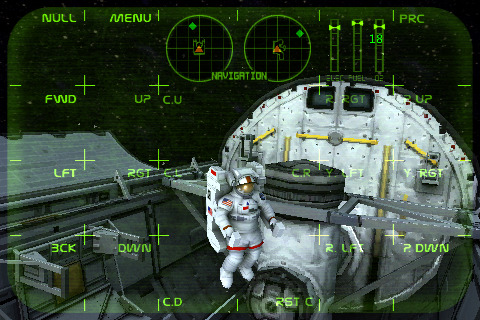
To identify the bits that repeat I had to add numbers to the texture.

This is the first step. Just some blocked colours and a few lines at the moment... it is going to take a while...

Monday 24 October 2011

Astronaut completed

The astronaut and MMU (Manned Manouvering Unit) textures are now completed. I might have to adjust the contrast levels based on the rest of objects in the game but all the detail is now in.

Here are some shots of the 3d model.


I will export the texture to the game and take some screenshots later today.


Friday 21 October 2011

Hubble completed and ingame

The Hubble telescope is finally completed.

I had to reduce the contrast layer and turn down the red reflection overlay but I think the result is better than the screenshots in the previous post.

I exported the textures and finally I had a look at it in the iphone. It is nice to see what it looks like in the target platform instead of just the 3d package.


Thursday 20 October 2011

Hubble almost completed

The hubble telescope texturing is almost finished.

All I have to do now is to add the attachments for the handles and a few other details and I will consider the hubble completed.


And a closer look


Wednesday 19 October 2011

Ingame Shots

I have been updating a lot of small things that make the game run better and I have exported the new textures into the game. I think it can be a good idea to start showing what the game looks like

Here are a couple of shots


Tuesday 11 October 2011

Hubble progress

I have been detailing the hubble textures a bit more.

Using the blocked colours and rough panel lines as a base I have been simulating highlights and shadows. I have also been simulating the reflections using a nice brush from Photoshop.

The orange handles give a lot of character and extra detail to the whole look. They are a mix between real geometry and texture with a simple "drop shadows" effect.


Monday 10 October 2011

Hubble telescope

The shuttle is finished and I have now started with the Hubble telescoope.

I start with blocked colours and simple lines to define the panels.


American Flag

Finally I have found a method to allow me to reuse mirrored textures to create unique areas.

I had an issue with the flags in the shuttle wings that didn't allow me to put the logos in both sides. I have fixed this by rebaking the diffuse maps with new mapping.

This is the final result.

Thursday 6 October 2011

Space Shuttle completed

Finally the Space Shuttle has been completed. The texturing is done for all parts and ready to be exported into the game.

The interior cloth type surface has taken a while to complete but there it is. Looking quite nice.


The next step is to texture the Hubble Telescope

Wednesday 5 October 2011

Second post: Texture process

In this second post I thought it could be interesting, for people not familiar with the game development process, to explain the texturing process I followed in the shuttle in a high level manner.

The first thing needed is the object geometry


The next step is to "bake" the lighting into it using what is commonly known as Ambient Occlusion


Using this AO as a base, the general colours can be blocked out and the details painted on top.


First Post. Space Shuttle texturing

This is the first post of the Astronaut Game blog.

I think it would be a good idea force me to make a daily post so I will start with what I am doing today which is texturing the space shuttle.


These are views of the game model with work in progress textures. I don't have much to say at this point so i will just add a few pictures instead.